
Getting Started in Astrophotography
This page will be completed with the help and advice of Gareth Jackson.
(Pictures, except Palomar photos, on this page ©Gareth Jackson, 2023)
Gareth is a north Wales based astro-photographer who has much more experience in this field, using DSLR equipment than I. Unbelievably he has only been taking photos of the night sky for a few years. Gareth started his journey into astro-photography in 2020. He has kindly agreed to help me devise this page to give would-be astrophotographers a good start in the interesting specialist sideline of our hobby.
Rather than a step by step approach, Gareth will outline his own path and give pointers for you to follow:
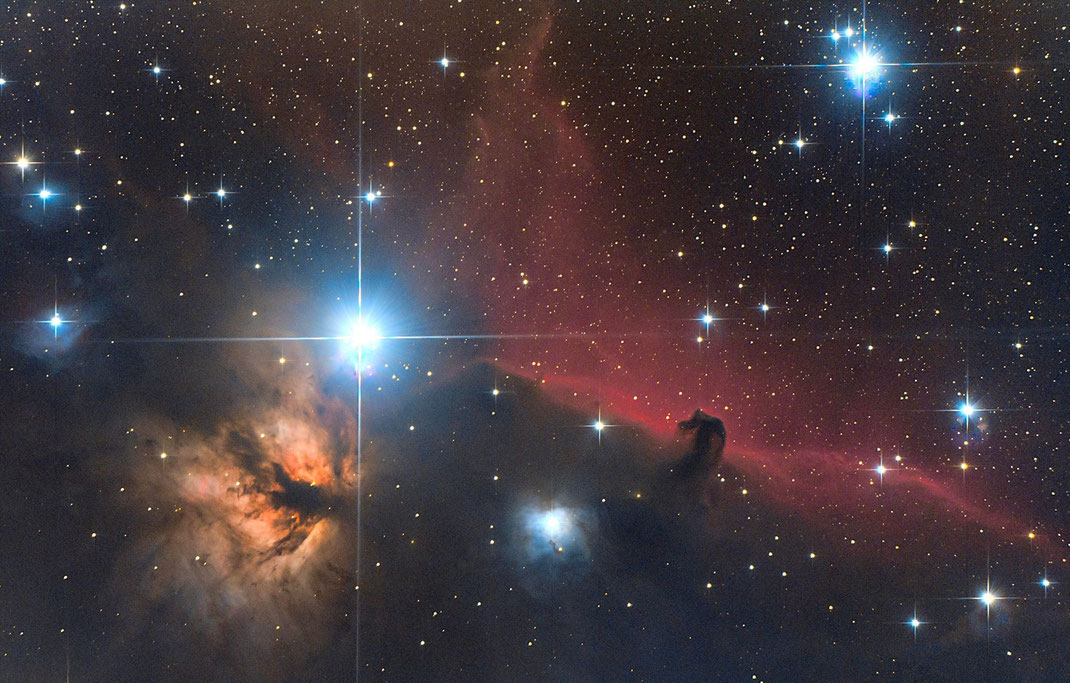
WOW! : Gareth's first picture of The Horsehead Nebula and the Flame Nebula in Orion.
I'm sure you will agree that anything Gareth has to say about photography through the telescope (or just with a DSLR!) will be worth listening to. I can't wait to bring you this page in full.
SuperCooper Says: Years ago, when I started out in this hobby, astro-photography was done with film and a lot of trial and error. The images
produced were an average of the seeing conditions and although some good results were to be had, it wasn't until the advent of digital photography and stacking programs that amateur
astro-photography really took off.
These days you can shoot video and then pick the best shots from that video before stacking them into one image that shows the most detail. You can thus avoid
the moments of bad seeing and the slightly smudged images to produce not an average of all the shots taken, but just of the best shots.
For information on taking Moon shots with your mobile phone (a good start into AP) there is a page dedicated to the process: Click Here.
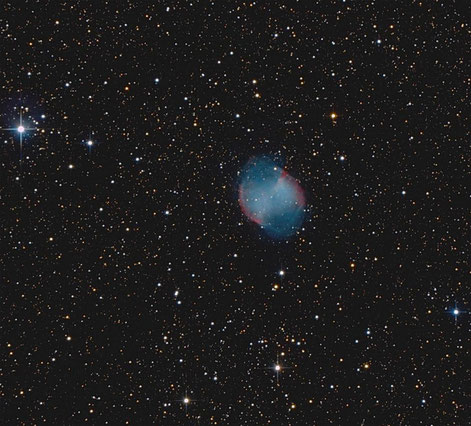
Pic: Gareth's (Dec 2022) pic of the Dumbbell Nebula, M27 in Vulpecula. This is a much better quality image than even the best shots of the 1970s, when I was bitten by the bug of astronomy, better even than those from the legendary 200" Palomar telescope!

This was the quality of the photographs that inspired us in the 1970s! This was considered 'cutting edge' quality and detail in those days. Thank goodness for the advent of digital image processing!
Compare the two: The obvious difference is the colour in gareth's image. Then there's detail in the areas that Palomar has overexposed, to get detail in the fainter parts. Gareth's image shows the detail, the fainter parts and the stars within the nebula. There is no 'grain' in Gareth's image from use of fast film. From a scientific, and an aesthetic point of view, Gareth's image is far superior to the Palomar image.
Pic: Not so WOW! : The 200" Palomar Monochrome film image of M27, The Dumbbell Nebula
A similar process can be done using 'long exposure' single shot images. Once again, with the advent of digital imaging this process has changed a lot since the days of film. A long exposure astro-photo of a subject doesn't have to be done all at once. It can be split between different events, even over several nights or weeks! Then each session (which might have been ten to fifteen minutes) can be stacked to produce one image with a total exposure time of maybe three hours!
Because of this, and the detail available to modern photo chip technology equipment, you can achieve pictures from quite small telescopes that would have been impossible using equipment five times bigger in the past. This is a revolution in imaging that is welcomed by all.
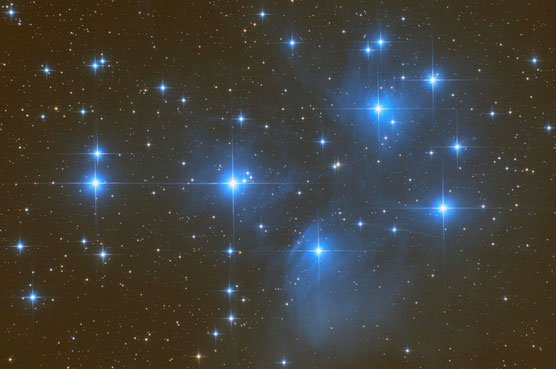
Pic: Gareth's December 2022 pic of the Pleaides, M45 in Taurus.
BEGINNINGS:
by Gareth Jackson
Edited by SuperCooper
I started my astrophotography (AP) journey, during UK lockdown 1 (April 2020). I have owned a telescope for many years. It was a Tasco Galaxsee on an equatorial mount, and it served me well for
many years. (It had a 114mm diameter spherically figured mirror with a focal length of 500mm f4.4)
Although certainly not a great telescope, especially for the price I paid almost 20 years ago (around £240 as I recall), it allowed me my first views of Saturn (I still remember the excitement),
Jupiter and some of the brighter Messier objects like M42 Orion, M13 Hercules and M31 Andromeda. For this telescope however, the Moon was probably the best object to look at.
I was browsing the internet one day, I was actually looking for a new finderscope for the Tasco as it had been misplaced (possibly thrown away during the annual shed clearance) and stumbled across some cheapish Plossl eyepieces on Amazon. I thought that would be a good upgrade, and it really was!
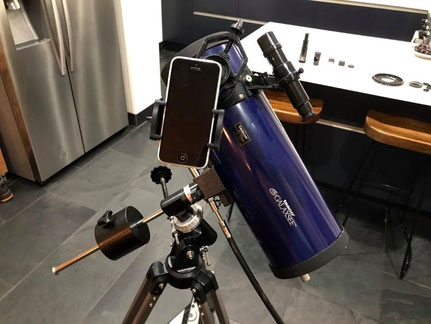
During my searches I also came across a very cheap mobile phone holder for the telescope, and I thought what a great idea! Little did I realise then that the rabbit hole went much deeper than I thought possible.
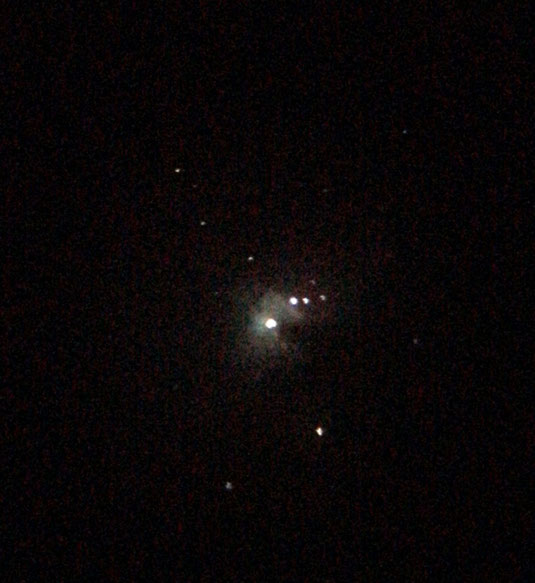
So, my initial attempts at the moon were okay, but then I tried on M42. And what a an awful result! Trailed stars and a blurry image.
Pic: Tasco image of M42 in Orion with Mobile phone.
(SuperCooper says: You can see some of the nebulosity and the Trapezium is just one blob containing the four stars. It's a start, but I agree with Gareth, it could be better!)
So then I decided to do some further research on taking photos through a telescope with a mobile phone. I downloaded an App called Nightcap, which allowed a bit more flexibility in terms of
exposure time, ISO etc. But still I was frustrated with the setup and imaging results for faint objects using a mobile phone.
Because of lockdown, I was saving quite a bit of money, and so decided to upgrade my telescope. (I was lucky to still be working)
I purchased a nice Helios 90mm f11 refractor from 'SuperCooper' through eBay, but whilst waiting for the auction to end, an 8” SkyWatcher 200P Newtonian on a Dobson type mount came up for sale very close to my home. I bought that too!
The Helios 90mm EQ refractor turned up and I was very pleased with this new bit of kit. I also collected the 200P Dob and tried them both out on the next clear night.
What a difference to the Tasco these two telescopes were! I would recommend the 8" telescope to any beginner. It came with an adaptor for attaching a DSLR, and so I also bought a second hand Canon 600D. But still, I was not having much success except for some moon photography.
(After using the 8" almost exclusively, I sent the refractor back to SuperCooper who sold it for me, for a profit, on eBay! During our conversations about telescopes, we also became good friends!)
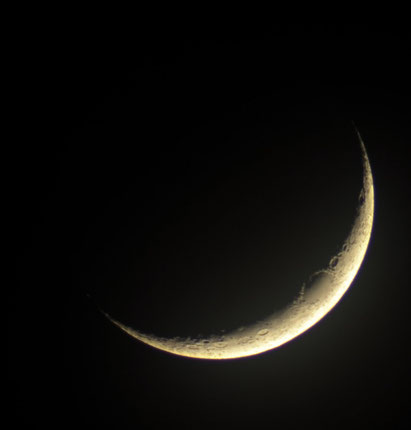
Pic: The Moon: An initial, single shot, effort through the 200P with the Canon 600D
At this point, the AP bug had gotten to me. So, I purchased a second-hand EQ5 equatorial mount and also a motor for the RA axis. Now I was cooking and getting some longer exposures without too
much star trailing.
I also purchased a SkyWatcher 72ED telescope (Short focal length refractors are great for AP beginners).
I think the biggest jump came when I hooked up my laptop to the system to allow greater control over image acquisition and learned the benefit of using a guide camera to prevent trailing stars.
This also allowed me to learn about stacking images, using calibration frames and the dark art of post processing for the final image.
And so, over the last two years, I have steadily built up an imaging rig, learning the process slowly, upgrading some things and adding a few extras, and I am, for now, happy with the images I am producing.
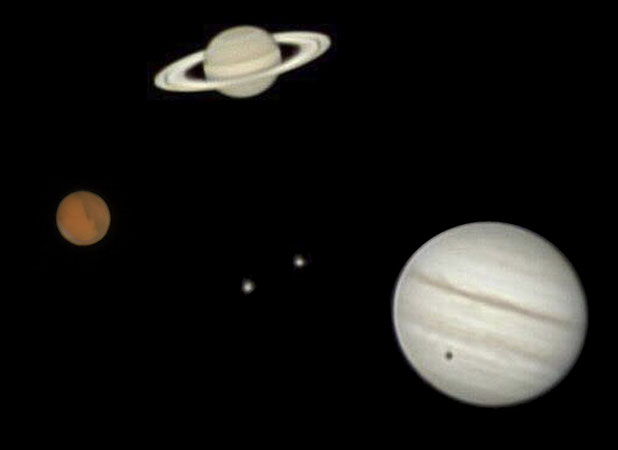
Pic: A compilation of Gareth's images of Mars, Saturn and Jupiter (with two moons and moon shadow) taken as he improved along the way.

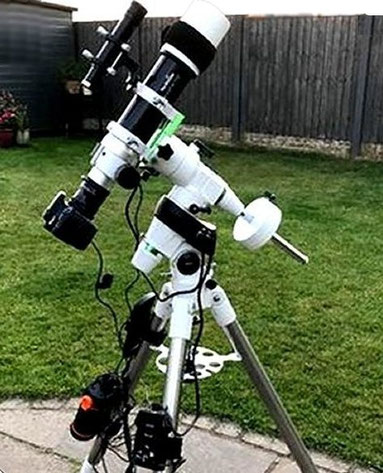
Gareth's current equipment set-up is as follows:
HEQ5 mount with either 72ED or 150PDS telescope attached.
50mm guide scope with ASI120mm guide camera.
Canon 600D or Canon 1100D (Astro-modified).
ASIAIR Plus for controlling everything.
Pic: SuperCooper (left) and Gareth Jackson photographed together in 'Telescope Towers', Sheffield. Early Dec 2021
Gareth says:
"My knowledge of telescopes and eyepieces etc. comes from the SuperCooper Telescope Help website. But, I learned nearly everything regarding astro-photography (AP) from watching many informative and interesting YouTube videos (such as Nico Carver’s "Nebula Photos" and Trevor Jones’ "Astrobackyard". I have also visited so many websites and watched so many videos, that there would be far too many to list here. Search YouTube for yourself - There's a lot out there that will guide you well."
DSLR Astrophotography
So, you want to take photos of space?
Astrophotography is a great way to share the wonders of the night sky.
So, how do we do it?
Well, let’s first determine what we mean by astrophotography (AP).
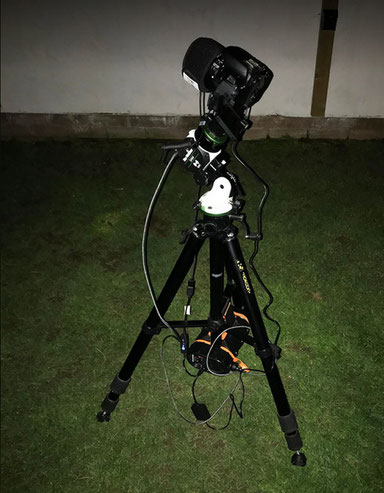
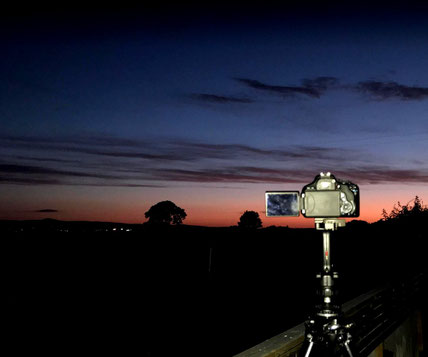
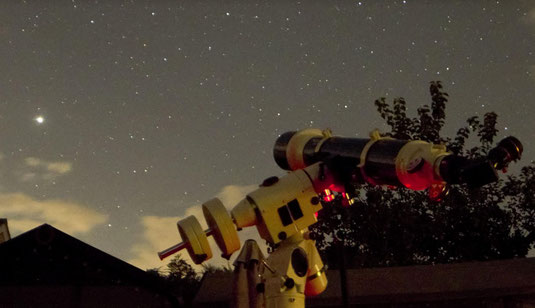
Pic: DSLR attached to driven EQ mount on tripod
It’s such a broad term and can be a simple handheld shot of the night sky with a mobile phone camera, or you could hold (or fix) the phone to the eyepiece of a telescope. At the other extreme it could be a long exposure photo of a deep sky object using a monochrome camera with different filters to isolate particular gases in nebulae.
So, let’s start at the beginning (or close to it) and explore the basics and how we can create great photos with modest equipment.
Basic DSLR and tripod
First of all, we need to remember that the stars move (well actually the earth rotates!) and the more we magnify our view, the faster those stars move!
We also need to consider that when taking photos of stars etc, they are very dim and so we need to be able to collect as much light on the camera sensor as possible.
And this, inevitably, leads us to the first issue we need to consider:
Exposure time:
We want to have as long an exposure as possible to be able to catch those precious photons (light particles). Seems straightforward, but consider that the longer the exposure time the stars will begin to trail and look elongated.
This, in itself, is not a bad thing if you want to create those stunning star trail photos. But aside from this style of AP, what we want are pinpoint stars in our photos.
So, how long can we expose for before we begin to see star trails? Luckily there is a well known guide to exposure called ‘the 500 rule’ which states that if you divide your focal length of camera (or telescope) into 500, this will give you a guide to how long an exposure can be.
In reality, this does not work too well, as it depends on what part of the sky you are looking at e.g. pointing your camera at Polaris, this rule will probably be sufficient as the stars are moving slower around the celestial pole. However if you point your camera south, toward the celestial equator, then you may want to adjust the 500 rule - to more like a 300 'rule'!
Example of 500 rule: Photographing the constellation Cassiopeia (nice and close to the pole):
A 50mm lens would be: 500/50=10 -Therefore, you have a maximum 10 second exposure before obvious star trailing in the image!
Example of 300 rule:Photographing Orion's belt and M42 (nearly on the celestial equator):
A 70mm lens would be: 300/70=4.25 - Therefore, you have a maximum 4.25 second exposure before obvious star trailing in the image!
SuperCooper says:
Just for clarity, Gareth is talking about the focal length ("50mm or 70mm lens") in these examples, and NOT the lens diameter!
So this 'rule' is okay if you are using the fairly wide angle lenses found on a DSLR (28-70mm). However, when we start to increase the focal length, even to 300mm, we are suddenly down to maybe less than a 1 second exposure and this is not going to show any detail in those faint fuzzies! Luckily, there is a process called ‘stacking’ where we take multiple images of the same shot and stack them together to increase the effective exposure time. Another way to avoid trails is to use an EQ mount that allows tracking of the sky, so you can track your object to negate the trails altogether.
There are some other considerations regarding the exposure 'rule' for unguided shots, which we will come on to later in this exploration, but which may not apply once you add tracking and stacking into the process - Read on!
Astro-Photography on a budget.
NOTE: As mentioned this page is for guidance:
Gareth has suggested the following headings for future installments to this page: These are considerations that you will need to address as you move along your AP journey.
Importance of polar alignment
Polar Alignment Methods
Attaching a DSLR to a telescope
Motorise the EQ mount
The importance of balance
Exposure and ISO
FOV and focal length
Planetary imaging
Deep Sky imaging
Image processing
The next level: Guiding and automation
SOME OF GARETH'S EQUIPMENT SET-UPS:
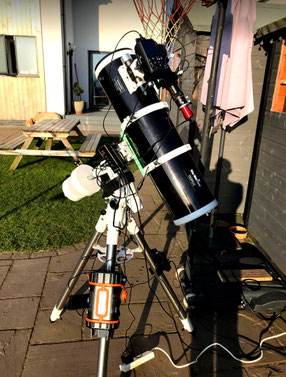
He has a SkyWatcher 150PDS with all the knobs and whistles
With which he can turn out a photo like The Horsehead Nebula shot at top and the Pleiades pic.
Gareth also has a superb SkyWatcher 72ED
With which he can produce a photo like the Dumbbell Nebula shot!
Gareth has a number of amazing instruments and uses them all regularly. This 100mm refractor is being used for visual observation of Jupiter, under yet another superb Welsh sky!

BEFORE YOU THINK YOU CAN'T DO IT!
REMEMBER...
Gareth started out with a modest Tasco Galaxsee telescope and a mobile phone!
Following the advice in this page, and throughout this website, you too can learn to take excellent photographs of the wonders of the night sky.
If you plan to have a go, you could start off today with a visit to the SuperCooper 'Moon Photography' page: HERE
Gareth's astro-photos shown on this page are taken under the darks skies of Wales and represent the best of British sky conditions. With a little patience and perseverance, you could get similar results with your equipment if you carefully follow the guidance on this page.

M101 in Cassiopeia Distance = 21M light years
This galaxy is visible in your telescope as a small fuzzy patch. Larger telescopes may show some detail. An excellent target for AP.
In 2023 this galaxy had a supernova erupt in its outer spiral arm (See animation). This is a photo by Gareth. It shows the galaxy before and after the supernova became aparent. The
light from a supernova can outshine all the other stars in the galaxy. See how bright it is compared to the brighter stars in the M101 galaxy.
This is the one area where DSOs may change over time. The supernova subsided in the following months and the galaxy returned to looking very similar to its apearance before the event. Nevertheless, this is an interesting and scientifically useful part of observing and photographing DSOs.
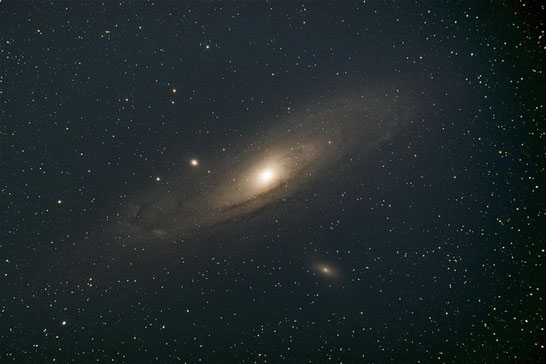
Gareth Jackson's M31 - Taken with his SkyWatcher 72ED scope.
I think you'll agree that anything Gareth has to say on this subject will be very well recieved.
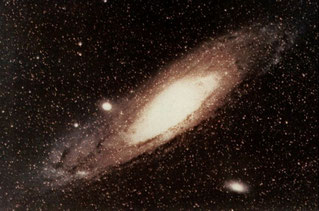
Pic: Yet another of Mount Palomar's 1970s efforts - This time in colour!
It's a wonder we ever got inspired!